If a photo looks too dark, washed out, or strangely flat, you usually do not need a full desktop editor to rescue it. A careful brightness and contrast adjustment can make an image clearer in less than a minute. This guide explains how to adjust image brightness and contrast online free, what each control actually changes, and how to avoid the most common mistakes that make edited photos look harsh or unnatural.
AiNowly’s free Brightness & Contrast tool is designed for quick browser-based corrections. It is especially useful for screenshots, product photos, scanned documents, social graphics, travel photos, and images that simply need better visual balance before you upload or share them.
Adjust image brightness and contrast online free: the basic workflow
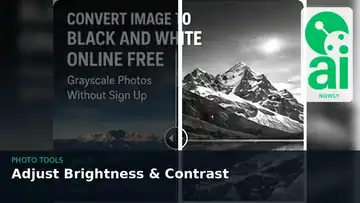
For most everyday photos, the best workflow is simple. Open the AiNowly Brightness & Contrast tool, add your image, move the brightness control slowly until important details are easier to see, then adjust contrast so dark areas and highlights feel separated without looking clipped. Compare the edited image with the original before downloading, and keep the original file in case you want another pass.
What brightness and contrast actually change
Brightness and contrast are related, but they solve different problems. Brightness changes the overall lightness or darkness of the image. Increasing it can reveal details in an underexposed photo, while decreasing it can tame an image that feels too bright. Contrast controls the separation between light and dark areas. More contrast can make an image feel sharper and more defined; less contrast can soften a scene that looks too aggressive.
Modern browsers support image filter operations such as brightness() and contrast(). MDN documents both as established filter functions, with 100% representing the unchanged image for each control. Values above 100% increase the effect, while lower values reduce it. That technical behavior is useful to understand because it explains why a small slider move can have a noticeable visual effect.
How to adjust image brightness and contrast online
- Open the AiNowly Brightness & Contrast tool.
- Add the image you want to correct.
- Move the brightness control slowly until important details are easier to see.
- Adjust contrast second so dark areas and highlights feel separated without looking clipped.
- Compare the edited image with the original before downloading.
- Save the corrected version and keep the original file in case you want to make another pass.
The order matters. If you push contrast first on a very dark image, shadows can become even harder to recover visually. Correcting the overall light level first usually gives you a more predictable starting point.
How much brightness should you add?
There is no universal percentage that works for every photo. A dim indoor photo may need a noticeable lift, while a slightly underexposed product image may need only a small adjustment. The safest approach is to increase brightness until the subject becomes clear, then stop before bright surfaces lose visible detail.
Watch faces, white shirts, windows, clouds, and light-colored product packaging. Those areas reveal over-brightening quickly. If they turn into featureless white patches, reduce brightness. The goal is not to make every image bright; the goal is to make the important information easy to see.
When should you increase contrast?
Increase contrast when an image looks gray, hazy, or flat even after the exposure feels acceptable. A modest contrast boost can help product edges stand out, make a landscape feel deeper, and improve the readability of some scanned documents. MDN’s documentation for contrast() notes that 100% leaves the image unchanged and values above 100% increase contrast.
Do not treat contrast as a sharpness control. Excessive contrast can crush shadow detail, remove subtle skin tones, and make text or graphics look overly hard. If your image already contains strong blacks and bright highlights, you may need little or no extra contrast.
Best settings for dark photos
For a dark photo, start with brightness rather than trying to force the image with heavy contrast. Raise brightness gradually, then add a small amount of contrast only if the result feels washed out. If the brightest parts of the image begin to lose detail, back off the brightness control.
This approach works well for indoor photos, phone pictures taken near sunset, and images captured in backlit environments. It will not reconstruct detail that was never recorded, but it can make usable information much easier to see.
Best settings for washed-out photos
A washed-out image often does not need much more brightness. It usually needs better separation between tones. Try increasing contrast gently while leaving brightness close to its original level. If the image becomes too dark after adding contrast, compensate with a small brightness increase.
For product photography, keep neutral backgrounds in mind. A white background should still retain enough separation from the object to show its outline. If you are preparing a product image for a store listing, you may also want to use AiNowly’s Background Remover after correcting the lighting.
Improve scanned documents and screenshots
Brightness and contrast are not only for photography. A faint scan can become easier to read when the background is brightened and the difference between text and paper is increased. Screenshots with dull UI elements can also benefit from a modest contrast adjustment.
Be careful with documents that contain stamps, pencil marks, or very light handwriting. Too much contrast may make faint information disappear. Always check the smallest text before saving the final version.
Brightness vs exposure: are they the same?
They are not exactly the same. In advanced photo editors, exposure controls can model changes closer to camera exposure behavior, while a basic brightness control changes displayed lightness more directly. For fast web editing, brightness is often enough when the goal is simply to make a photo easier to see or present.
If you are editing RAW photographs for professional printing, a dedicated RAW editor gives you more control. For JPG, PNG, WebP, screenshots, social media graphics, and everyday web images, a browser-based brightness and contrast tool is often the faster option.
A practical three-pass editing method
Pass 1: visibility. Set brightness so the subject is easy to see. Ignore dramatic style for the moment.
Pass 2: separation. Adjust contrast until important shapes and edges have enough distinction.
Pass 3: sanity check. Compare with the original. Look specifically at faces, highlights, shadows, text, and background details. If the edit feels obviously processed, reduce the adjustment slightly.
This method is fast because it gives each slider one job instead of trying to fix everything at once.
What to do after fixing brightness and contrast
Once the image looks right, the next step depends on where you plan to use it. If the dimensions are too large, use the Image Resizer. If the file size is heavy for email or a website, run it through the Image Compressor. If framing is the problem, the Image Cropper can remove unwanted edges without forcing you into a full editing suite.
For format changes, AiNowly also provides PNG to JPG, JPG to PNG, and a WebP Converter. Keeping these jobs separate helps you preserve quality while making only the changes you actually need.
Common mistakes to avoid
- Increasing both sliders too aggressively: the image can become bright and harsh at the same time.
- Judging only the center of the photo: check highlights and shadows near the edges too.
- Editing a compressed copy repeatedly: keep an original and make your main adjustments from that file.
- Ignoring the final use: a photo for a dark website background may need different balance than one printed on white paper.
- Assuming brighter is always better: mood, detail, and realistic skin tones matter more than maximum brightness.
Frequently asked questions
Can I brighten a photo online without Photoshop?
Yes. For straightforward exposure-style corrections, an online brightness tool is usually enough. You can adjust the image, preview the result, and download the corrected version without installing a desktop editor.
Does increasing brightness improve image quality?
It improves visibility, not the underlying resolution. If a photo is dark but contains recorded detail, brightening may reveal it. If detail is missing because the image is heavily blurred, clipped, or extremely compressed, brightness alone cannot recreate it.
Why does my image look gray after lowering contrast?
Lower contrast reduces the difference between lighter and darker areas. At extreme values, tones move closer together and the image can look flat or gray. Returning contrast toward its neutral value restores separation.
Should I edit brightness before resizing or compressing?
Usually yes. Make visual corrections first, then resize and compress the finished image. That gives you a cleaner workflow and avoids making important editing decisions on an unnecessarily degraded copy.
Final takeaway
If your image is too dark, too flat, or simply needs a cleaner presentation, brightness and contrast are the two fastest controls to try. Make small adjustments, compare frequently with the original, and stop once the important details look natural and clear. You can start with AiNowly’s Brightness & Contrast tool, then resize, crop, or compress the result only if the final use requires it.
References: MDN: CSS filter property, MDN: brightness(), and MDN: contrast().