
A photo that opens sideways is a small problem that can become surprisingly annoying when you are uploading a product image, submitting a document, preparing a presentation, or posting to social media. If you need to rotate image online free, the fastest solution is usually a focused browser tool rather than a full photo editor.
AiNowly's Rotate & Flip Image tool is designed for these quick orientation fixes. You can rotate an image, flip it horizontally or vertically, preview the change, and save the corrected result.
How to rotate image online free
Open the AiNowly Rotate & Flip Image tool, select your photo, choose the rotation you need, inspect the preview, and download the corrected file. A 90-degree turn is useful for a sideways image, while 180 degrees fixes a photo that is completely upside down.
Before downloading, check text, faces, logos, and the intended aspect of the image. Rotation is simple, but choosing the wrong direction is easy when you are working quickly on a phone.
Why do photos sometimes appear sideways?
Modern phones and cameras can store orientation information in image metadata. Instead of physically rearranging every pixel when the device is turned, a camera may save an orientation instruction that tells compatible software how the image should be displayed. Most modern apps interpret that information correctly, but some uploaders, older software, conversion workflows, and content-management systems can behave differently.
That is why a photo may look correct in your gallery but appear sideways after upload. Rotating and exporting a corrected version can make the intended orientation explicit in the new image.
Rotate 90 degrees, 180 degrees, or 270 degrees?
A 90-degree clockwise rotation moves the top edge of the image to the right. A 90-degree counter-clockwise rotation moves the top edge to the left. A 180-degree rotation turns the image upside down. A 270-degree clockwise turn is equivalent to 90 degrees counter-clockwise.
For ordinary phone-photo mistakes, you usually need only one 90-degree turn. If the image is upside down, use 180 degrees instead of clicking the 90-degree button twice.
Rotate vs flip: an important difference
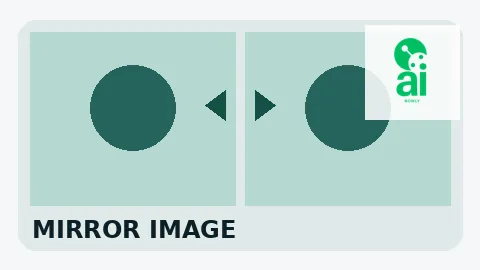
Rotation turns the entire image around its center. Flipping mirrors it across an axis. A horizontal flip swaps left and right; a vertical flip swaps top and bottom. This matters when the picture contains text, directional symbols, clothing details, product labels, or recognizable asymmetry.
If you mirror a selfie horizontally, the composition may feel more familiar because front-facing camera previews often behave like mirrors. But any readable text in the image will also become reversed, so always check before publishing.
When should you flip an image horizontally?
A horizontal flip can help when a subject faces the wrong direction for a layout. For example, if a person is looking toward the outside edge of a banner, mirroring the image can make the subject look toward the headline or call to action instead. Designers also use horizontal flips to balance collages and compare compositions.
Be careful with branded products, uniforms, road signs, tattoos, printed documents, and screenshots. Mirroring those elements can create an inaccurate or obviously edited image.
When is vertical flipping useful?
Vertical flips are less common for ordinary photography but useful for reflection-style graphics, texture work, pattern creation, and some design compositions. A vertical flip can also correct a scan or exported graphic that was accidentally reversed top to bottom.
For a normal upside-down photo, though, a 180-degree rotation is usually the correct operation because it preserves left-right orientation.
Does rotating an image reduce quality?
A right-angle rotation does not inherently require the image to become smaller or blurrier. However, the final quality depends on how the output is encoded. Repeatedly exporting JPEG files can add compression artifacts because JPEG is a lossy format.
If quality matters, keep the original file and make the rotation as one of the final editing steps. If you later need a smaller file for a website or email, use the Image Compressor separately so you can control the size reduction intentionally.
Rotation does not change portrait into landscape by cropping
Turning an image 90 degrees swaps its displayed width and height, but it does not magically recompose the photograph for a new aspect ratio. If you have a portrait image and need a wide social banner, rotating it is usually not the right solution.
Instead, first decide whether the content should actually be rotated. If the orientation is already correct but the shape is wrong, use the Image Cropper or Image Resizer. Cropping changes the frame; resizing changes the dimensions; rotation changes direction.
How to fix a sideways product photo
For e-commerce, correct orientation is especially important because product photos are scanned quickly by shoppers. Start with the original image, rotate it until labels and vertical lines are upright, and then check the crop. If the product needs a cleaner background, use the Background Remover.
Afterward, resize and compress the final asset for the marketplace or store theme. Avoid rotating a low-resolution screenshot of the product when the original camera image is available.
How to rotate a scanned document image
Scanned receipts, forms, certificates, and notes often arrive sideways because the page was placed differently in the scanner or photographed with a phone. Rotate the image so text reads normally from left to right. If the scan contains several pages saved as a PDF rather than separate images, use the Rotate PDF tool instead.
Our Rotate PDF guide explains the document workflow separately, which avoids converting a PDF to images just to fix page orientation.
Rotate first or crop first?
If the image is clearly sideways, rotate it first. Working in the correct orientation makes cropping easier because you can judge the composition naturally. After rotation, crop unwanted edges, then resize to the target dimensions, and compress only if the file needs to be smaller.
A practical order is: rotate or flip, crop, resize, then compress. This minimizes unnecessary processing and makes each decision easier to evaluate.
What about social media photos?
Social platforms can crop previews differently depending on placement, so orientation is only one part of preparation. Make sure the subject is upright first, then crop for the destination. A vertical photo may be appropriate for a Story, while a wide image may work better as a banner or link preview.
If you are building a dedicated header rather than fixing an existing photo, try AiNowly's Social Banner Maker after correcting the source image.
Common mistakes to avoid
Do not mirror images containing text unless reversing the text is intentional. Do not use rotation to solve an aspect-ratio problem. Do not overwrite your only original image before checking the output. And do not repeatedly export a JPEG through several tools if you can perform the workflow from one high-quality source.
Also remember that a slightly crooked horizon is different from a 90-degree orientation error. A basic right-angle rotator is perfect for sideways photos; fine straightening by a few degrees may require a tool that supports custom angles and handles the exposed corners.
Frequently asked questions
How do I rotate a photo 90 degrees online?
Open the AiNowly Rotate & Flip Image tool, add the photo, choose a 90-degree left or right rotation, preview the result, and download the corrected image.
Is flipping the same as rotating?
No. Rotation turns the image around its center. Flipping mirrors the image horizontally or vertically.
Why is my photo sideways only after uploading?
One possible cause is orientation metadata being interpreted differently by the destination platform. Exporting a correctly rotated version can make the intended pixel orientation more consistent.
Should I rotate or crop a portrait photo to make it landscape?
If the subject is already upright, do not rotate it merely to make the canvas wide. Crop or resize it for the target layout instead.
Final takeaway
When you need to rotate image online free, focus on the actual problem: sideways orientation, upside-down content, or a mirror effect. Use AiNowly's Rotate & Flip Image tool for the orientation change, then use Crop Image, Resize Image, or Compress Image only when the next step genuinely requires it.
Keeping those operations separate gives you a cleaner workflow and reduces the chance of fixing one problem while accidentally creating another.